How to Clean Thrifted Earrings: 7 Simple and Effective Tips to Restore the Glam!
Thrifted and vintage jewelry offers timeless style, often at affordable prices. However, pre-loved accessories require some extra care before wearing them. If you want to know how to clean thrifted earrings safely and restore as much glam as possible, hear me out through the tips shared in this article.
Proper cleaning removes accumulated grime and germs, restores luster, and helps cherished antique pieces last for years to come. Don’t be intimidated by the cleaning process!
With the right techniques and a few basic supplies, you can easily refresh your thrifted earrings to sparkling new condition.
Key Takeaways
Cleaning pre-loved earrings takes a delicate touch, but pays off in **sparkling, sanitized jewelry.** Here are the key tips to remember:
- Do your homework – Inspect markings and test metals to identify what you’re working with before cleaning. Different materials need different care.
- Respect vintage materials – Use gentle cleaning solutions, avoid over-soaking, and dry thoroughly. Handle antique and thrifted jewelry with care.
- Disinfect properly – Pre-owned earrings harbor germs. Use hydrogen peroxide, alcohol or vinegars to sanitize before wearing.
- Know your limits – Some damaged vintage may need professional repair. Don’t DIY major restoration work.
Treat your thrifted treasures with TLC, and they’ll stay beautiful heirlooms to enjoy for years to come!
1. Top Reasons to Clean Secondhand Earrings
Cleaning used earrings is more than just removing dirt – it’s absolutely crucial for:
- Killing lingering germs – We’ve all heard horror stories about trying on thrift store finds before disinfecting. Skip the skin crawlies and clean properly to sanitize pre-worn jewels. Even estate sale treasures from dear old Grandma could use a refresh!
- Restoring shine – With repeated wear, earrings lose their luster under the accumulated layers of skin oils, makeup, soap residue and everyday grime. Gently clearing away the buildup renews the sparkling brilliance vintage jewels were meant to have.
- Preserving precious materials – From silver to pearls, antique jewelry pieces are made from delicate mediums that can degrade, corrode and deteriorate over decades of use. Careful cleaning prolongs the lifespan of fragile vintage materials.
Take time to pamper your thrifted baubles, and they’ll amp up your outfits for years to come in all their vintage glory! Now let’s cover how to safely treat different jewelry types before wearing your pre-loved pieces.
2. Assembling Your Earring Cleaning Toolkit
Before delving into the cleaning process, gather these supplies:
- Mild soap: Opt for a gentle hand or dish soap without harsh chemicals. Dr. Bronner’s and Castille soap are perfect choices.
- Soft-bristle toothbrush: For gently scrubbing away dirt and buildup. An old toothbrush works great!
- Distilled water: Improves cleaning power and prevents mineral deposits.
- Baking soda: Sodium bicarbonate powder helps remove tarnish.
- White vinegar: The acetic acid in vinegar dissolves residue and buildup.
- Small bowl: For soaking earrings in cleaning solutions.
- Polishing cloth: Use a treated microfiber jewelry cloth to buff earrings to a shine.
- Cotton swabs: Helpful for cleaning crevices and other intricate areas.
- Hydrogen peroxide or rubbing alcohol: For disinfecting and sterilizing pre-worn earrings.
With your arsenal assembled, it’s time to identify the jewelry contents you’re working with. Proper materials identification helps avoid damage!
3. Identifying Metals and Stones Before Cleaning
Earrings can contain a mix of metals and mineral components, each requiring special care. Before cleaning, inspect earrings closely and look for:
- Hallmarks: Stamped letters/numbers indicating gold, silver, or platinum. 10K, 14K, and 18K are gold. 925 or Ster indicates silver. PT or Plat is platinum.
- Magnet test: Many base metals like iron are attracted to magnets, while precious metals like gold aren’t.
- Weight: Heavy pieces likely contain precious metals versus lightweight base metals.
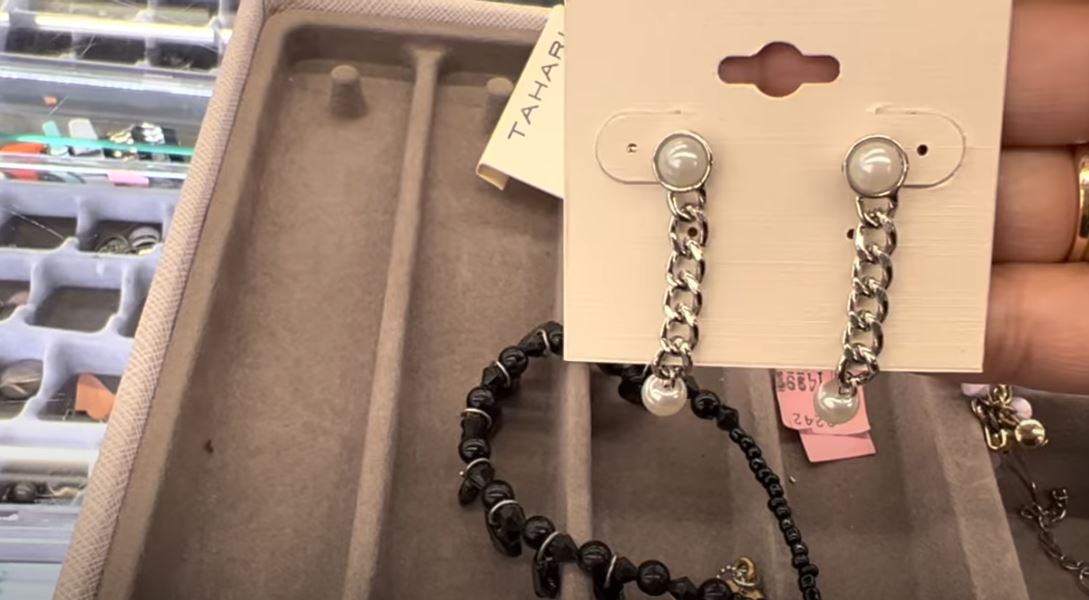
- Stone characteristics: Sparkling, colored, or translucent stones could be diamonds, rubies, emeralds, etc. Milky or iridescent stones may be pearls or opals.
Once you’ve identified the materials, it’s time to clean according to earring type. Let’s explore techniques for common earring varieties.
4. Step-By-Step Instructions for Cleaning Different Earring Types
Follow these detailed steps to clean various vintage and thrifted earring types.
Refreshing Fine Jewelry Earrings – Gold, Silver, Platinum
Intricately crafted fine jewelry requires gentle care. Here’s how to clean treasured metals like silver, gold and platinum:
- Fill a small bowl with warm water and add a drop of mild soap or dish detergent without strong chemicals.
- Gently place earrings into the soapy solution and let soak for 2-3 minutes. This loosens dirt and buildup.
- Remove earrings and use a soft-bristle toothbrush to gently scrub away tarnish grime, and oily residue from all crevices and decorative details. Take care around delicate filigree or beadwork.
- Rinse thoroughly under warm running water. The flowing motion helps carry away grime.
- Pat dry immediately with a soft cotton cloth or microfiber towel. Air drying can lead to water spots.
- Polish earrings with a treated jewelry polishing cloth to restore shine. Gently buff metals in a circular motion.
And voila! Your precious metals sparkle like new again!
Cleaning Gemstone Earrings – Diamonds, Rubies, Sapphires
While gemstones are hard, some porous types require careful cleaning:
- Fill a bowl with room-temperature water and add a drop of mild detergent. Avoid sudsy, foamy cleansers around faceted gems.
- Submerge gemstone earrings and let soak for 1-2 minutes. Minimize soaking time for porous stones like opal or turquoise.
- Use a soft-bristle toothbrush to gently dislodge dirt around settings and underneath gallery wires. Don’t scrub gems directly.
- One by one, hold earrings with tweezers and rinse under a gentle stream of lukewarm water to flush away residue.
- Dry immediately with a clean soft cloth. Place gems facet-side down on the cloth to catch water droplets.
With this gentle approach, even delicate gems stay bright and beautiful when cleaning thrifted treasures.
Maintaining Pearl and Organic Earrings
Natural pearls and organic materials like ivory, bone, and coral require special care, as they are porous and fragile when wet. To clean:
- Dampen a soft cotton cloth or cotton swab with lukewarm water. Avoid fully submerging organics.
- Very lightly wipe down individual pearls or organic materials to lift away dirt and oils. Take care not to soak or saturate the piece.
- Rinse the cloth under running water and wipe again if needed, using minimal moisture.
- Thoroughly hand-dry earrings with a clean dry cloth. Air drying prevents water damage.
With this gentle approach, you can safely refresh delicate organic earrings.
Cleaning Costume Jewelry Earrings
Vintage plastic, enamel, and rhinestone earrings require cautious cleaning to avoid harming coatings:
- Fill a bowl with room-temperature water and add a small drop of mild soap. Avoid hot water or prolonged soaking.
- Submerge costume earrings and gently swish for 30 seconds to 1 minute. Use a soft brush or cloth to spot clean.
- Rinse under cool running water. Prolonged soak times can damage lacquer finishes.
- Thoroughly hand dry with a clean cloth and allow to fully air dry. Avoid heat, which can warp plastics.
Repeat these steps as needed until earrings are clean, then keep your thrifted treasures looking their best with careful ongoing wear. With cautious cleaning methods, even faux jewels sparkle!
5. Disinfecting Pre-Worn Earrings
For sanitizing and disinfecting thrifted earrings, use:
Hydrogen peroxide: The bubbling reaction helps kill germs. Soak costume jewelry for 2-3 minutes, fine metals for 5-10 minutes max, and avoid with pearls or porous stones. Rinse thoroughly after soaking.
Rubbing alcohol: Excellent disinfecting properties. Dampen a soft cloth and gently wipe earrings down, taking care of fragile finishes. Allow to completely air dry.
Vinegar: Acetic acid makes vinegar a natural antibacterial. Mix equal parts vinegar and water. Submerge earrings for 2-3 minutes max, rinse thoroughly. Avoid with porous gems.
6. Expert Jewelry Cleaning Tips From a Thrift Shopping Addict
Take it from an avid thrifting enthusiast – with some simple tools, time and know-how, you can clean any pre-loved earrings to wearable perfection. Follow these professional tips for sparkling results:
- Set stones securely: Examine prong settings closely while cleaning. Use the jeweler’s glue to re-affix any loose gems.
- Dry thoroughly: Lingering moisture breeds tarnish and corrosion on metals. Blot thoroughly with a soft cloth after rinsing.
- Clean routinely: Regular light cleaning prevents major buildup. Use a polishing cloth to buff earrings between full soap-and-water washes.
- Learn safe solutions: Know which cleaners work with your earring materials. Harsh chemicals can irreversibly damage vintage finishes. When in doubt, go gentle.
- Inspect for damage: Look for cracking, cloudiness, or other signs of deterioration in old materials while cleaning. Repair or retire damaged thrifted earrings.
Follow these tips and soon you’ll be a thrift store jewelry cleaning expert!
7. When To Call In The Pros For Vintage Jewelry Repair
While cleaning provides basic upkeep, sometimes grandfather’s antique watch or great aunt Edna’s art deco brooch needs professional intervention for:
- Resizing rings: With decades of accumulated grime, rings can become stuck on fingers. Let a jeweler safely resize vintage bands.
- Replacing damaged stones: Cleaning may reveal a missing or cracked gem. Opt for a professional stone replacement to preserve value.
- Repairing broken settings: Pinning posts, reforming misshapen rings, or resoldering broken chains requires an expert jeweler’s skills.
- Appraising valuable items: If cleaning reveals a prized antique or vintage designer piece, get a professional appraisal.
When thrifted jewelry requires major repairs or restoration, don’t DIY – call the pros!
Final Thoughts – How to Clean Thrifted Earrings
Something about scoring an amazing jewelry find for just a few dollars and restoring it to glory just feels so satisfying! With some elbow grease and these cleaning tips, your earring collection will only get better with age. Vintage and antique earrings offer timeless beauty when cared for properly. Go ahead – dig through grandma’s dusty boxes or hit the thrift store treasure hunt. With the right know-how, you can clean and wear any pre-loved earrings confidently!
FAQs About Cleaning Thrifted Earrings
How can I identify what my thrifted earrings are made of?
Inspect for hallmarks, test with magnets, and check weight and stones to identify gold, silver, platinum, gemstones, pearls, etc. Understanding the materials helps you clean vintage jewelry properly.
What supplies do I need to clean secondhand earrings?
Have ready mild soap, a soft brush, distilled water, vinegar, baking soda, cotton swabs, polishing cloth, and disinfectants like peroxide or alcohol. Avoid harsh chemicals that can damage delicate materials.
How should I clean gold, silver, and platinum earrings?
Gently soak in mild soapy water briefly, scrub away built-up grime, rinse thoroughly, and hand dry immediately. Regularly polish precious metals with a treated jeweler’s cloth.
What’s the best way to clean pearls and other organic materials?
Very lightly wipe down with a damp soft cotton cloth. Avoid soaking pearls and organics. Dry thoroughly after cleansing to prevent water damage.
How can I disinfect used earrings before wearing them?
Soak in hydrogen peroxide or rubbing alcohol. You can also mix equal parts vinegar and water for an antibacterial dip. Rinse completely afterward.
How often should I clean thrifted earrings?
Clean gently every few months, or anytime earrings look dull. Frequent light cleaning prevents major buildup. Use a polishing cloth between full washes.
What kind of repairs require a professional jeweler?
See a jeweler for loose stones, damaged settings, stuck rings, or valuable antique pieces needing appraisal. Don’t DIY major restoration work.
How should I store cleaned vintage earrings?
Keep in a fabric-lined box or stand to prevent scratches and tangling. Proper storage protects your cleaned thrifted treasures.
Following proper practices helps keep pre-loved earrings sparkling and safe to wear for years to come!
editor's pick
latest video
Want Tips, Guides on Thrifting?
Subscribe to our newsletter today and get custom thrifting tips, and guides!
You can opt-out anytime.


